Desktop first run
This tutorial takes you from the v0.6 desktop welcome screen to a safe,
meaningful local Home state. It uses the checked-in fictional presentation
state, keeps provider=none, and makes no network request. Do not substitute a
real family tree, credential, prompt, response, database, backup, or log while
following it.
The 0.6 desktop source includes the learning path described here. A released 0.5 installer exposes only its bounded Home, Diagnostics, Settings, and onboarding control surface. Treat a development build as verification input, not as a supported release.
Before you begin
Use a supported, target-matched desktop build. The desktop is local-first: its private sidecar is a Local control channel, not a public or LAN API. You do not need an account, provider, API key, genealogy file, or cloud consent for this tutorial.
The screenshots use deterministic fictional fixtures. They contain no local paths, secrets, genealogy records, prompts, responses, or provider payloads.
1. Choose the local desktop
- Start AncestryLLM.
- On Welcome to AncestryLLM, review the three deployment choices.
- Keep Local Desktop (Recommended) selected.
- Confirm that Connect Remote and Host Remote say Not available in this release.
Local Desktop uses the private loopback sidecar and offline-first defaults. Selecting it does not discover a remote service, start a container, open a listener, configure a provider, or grant cloud consent.
2. Review startup checks
The welcome screen evaluates four sanitized startup components:
- Configuration
- Encrypted database support
- Credential storage
- Local workspace
A healthy report enables Continue to Home. Choose it to record only that onboarding is complete, then wait for the Home heading to receive focus.
If a required component is blocked, choose Open read-only diagnostics instead. The degraded application remains navigable, but it will not mutate preferences, settings, credentials, or storage. Follow only the remediation beside the stable code; never create a replacement database, reveal a local path, or fall back to plaintext storage.
3. Confirm the local Home state
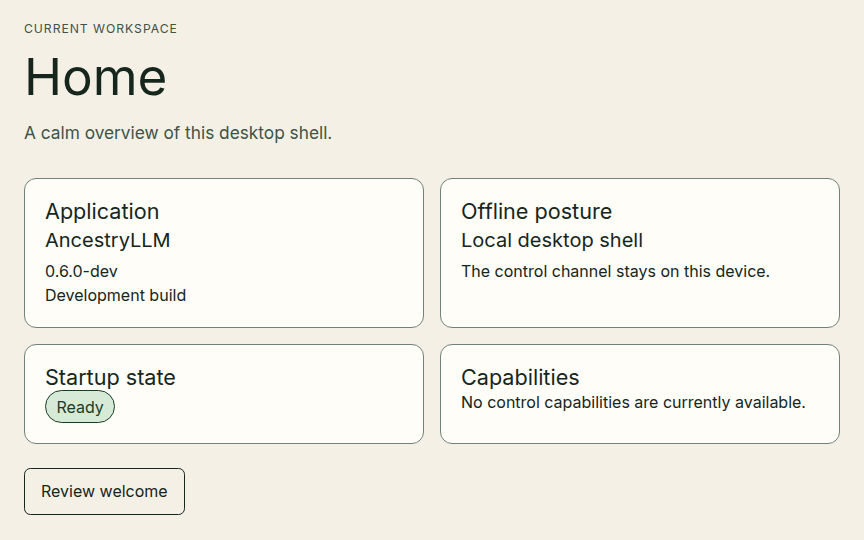
On Home, confirm the following cards are present:
- Application identifies the desktop build.
- Offline posture reports the local-first boundary.
- Startup state reports Ready for this tutorial.
- Capabilities contains only sanitized capability metadata.
The shell must still be safe when credentials happen to exist in the
environment: provider=none remains network-free and ambient credentials do
not select a provider. No provider SDK, genealogy file, or cloud consent is
needed to reach this result.
4. Explore without granting authority
Use the primary navigation to visit Diagnostics and Settings, then return to Home. The v0.6 source also exposes bounded Tasks and Chat destinations; merely visiting either one does not start work, select a provider, or disclose data.
Press Ctrl+K on Windows or Linux, or Command+K on macOS, to open Go to a workspace. Type a destination in Filter destinations, press Escape to dismiss the dialog, and confirm focus returns to the trigger. Keyboard users can use Skip to workspace to move directly to the current heading.
5. Revisit the welcome screen
On Home, choose Review welcome. This is temporary presentation state; it does not reset settings or change the saved onboarding preference. Choose Back to Home when finished.
Result and next steps
You now have a provider-none, network-free desktop Home state using only fictional presentation data. Continue according to your goal:
- Use Recover with desktop diagnostics if startup is degraded.
- Read the Desktop reference for destinations, states, keyboard behavior, and stable codes.
- Use the CLI reference for one-shot genealogy commands.
- Use the interactive console for the prompt-toolkit/Rich genealogy session.
The CLI and interactive console own the supported genealogy workflows. The desktop shell does not silently gain file, provider, network, or genealogy authority by sharing their application contracts.